So I finally got around to trying out what I hoped would be the ideal solution for replacing the CFL with LEDs in my Game Gear: using an opaque white straw as a diffuser tube for the two side-mounted LEDs.
Unfortunately,
The outcome was unsatisfactory.
If you recall, I had previously tried a frosted "clear" straw, with very small (if any) improvement over the exposed side-mounted LEDs. I had hoped that an opaque white straw would make the lighting more even across the screen and, by filtering the light through the white plastic, might also mimic the white CFL coloring more.
My theory actually did bear out, to some degree. The "hot spots" on the side of the screen near the bulbs were much diffused, and the coloring on the screen seemed more closely matched to that of a "stock" Game Gear. But the screen was dim. I found I was caught between a rock and a hard place, where either I could have a) the color and lighting to be somewhat natural, but the screen would be really dim and you'd have to hold the system at a 45 degree angle, or b) the screen would be *almost* bright enough (it never quite reached the appealing luminance of my good condition original system) but would be utterly washed out.
I didn't even bother taking pictures - it just wasn't worth it. My conclusion is that the LEDs couldn't come anywhere near reproducing the CFL lighting when filtered through an opaque white straw.
Someone suggested carefully using the original glass of the CFL bulb as the diffuser tube in the comments on one of my earlier posts. That would be super interesting to try, and may be the best bet in the end. But for the time being I would say the best implementation with two side-mounted white LEDs is with a frosted clear straw as a diffuser (per THIS POST)
Happy gaming!
Sunday, December 21, 2014

Sunday, April 27, 2014
Game Gear LED mod: Part II - straw man
If interested in upgrading your Game Gear to use battery-friendly LED in place of the hungry CFL, please see MY EARLIER POST on this topic.
The one major shortcoming I ran into was an overall dim-ish screen (despite the LEDs being very bright) and hot-spots at each edge where the LEDs sat. As a first pass to rectify the problem, I decided to insert a frosty-clear straw between the two LEDs - effectively replicating the shape/position of the original CFL bulb. The idea was that the straw would serve as a light diffuser, resulting in a more even backlighting of the screen (and allowing me to turn the brightness up more without washing the image out).
The results, however, were almost imperceptible. I am confident that it must TECHNICALLY function as a light diffuser. But clearly the straw I used, at least, was poorly suited and the effect was negligible.
Here's what I did, followed by some "before and after" shots.
1) I snatched a frosty clear straw from a food court. I needs roughly the same inner diameter as the outer diameter of the LEDs used.
2) I opened the Game Gear back up, and removed the reflective back plate with LEDs still attached
3) Measure the distance between ~halfway along each LED, and cut the straw to length. This length ensures you are able to a) flex the straw enough to pop it into place (without introducing kinks in the plastic) while b) ensuring it fits snugly enough to stay in place
 4) Reassemble the Game Gear
Easy!
But as mentioned above, the results were less than exciting. See the before and after shots below:
Note that it was tricky to get the lighting (room and backlight) the same for the two shots. But, the real take-home message is that the frosted clear straw basically had no perceivable effect.
Next up: I'm going to try to find an opaque white straw with a very glossy inside. This will probably require the light level to be turned up more, but hopefully will be a more effective diffuser...
The one major shortcoming I ran into was an overall dim-ish screen (despite the LEDs being very bright) and hot-spots at each edge where the LEDs sat. As a first pass to rectify the problem, I decided to insert a frosty-clear straw between the two LEDs - effectively replicating the shape/position of the original CFL bulb. The idea was that the straw would serve as a light diffuser, resulting in a more even backlighting of the screen (and allowing me to turn the brightness up more without washing the image out).
The results, however, were almost imperceptible. I am confident that it must TECHNICALLY function as a light diffuser. But clearly the straw I used, at least, was poorly suited and the effect was negligible.
Here's what I did, followed by some "before and after" shots.
1) I snatched a frosty clear straw from a food court. I needs roughly the same inner diameter as the outer diameter of the LEDs used.
 |
| straw is smooth on the inside, textured/frosted on the outside - sounds perfect, right? |
3) Measure the distance between ~halfway along each LED, and cut the straw to length. This length ensures you are able to a) flex the straw enough to pop it into place (without introducing kinks in the plastic) while b) ensuring it fits snugly enough to stay in place
Easy!
But as mentioned above, the results were less than exciting. See the before and after shots below:
 |
| Before |
 |
| After |
Next up: I'm going to try to find an opaque white straw with a very glossy inside. This will probably require the light level to be turned up more, but hopefully will be a more effective diffuser...
Sunday, November 3, 2013
Portal - A (very) late review of a still relevant game
Sometimes, life gets in the way. Sometimes it gets in the way of gaming bandwagons you would happily ride into the sunset.
Such is the case with the Portal franchise (Valve). The original Portal marked a fresh take on 1st-person puzzle solving and "platforming" - placing the player in what most screenshots imply is a FPS, but in reality is an immersive vehicle for creative spatial puzzle solving.
Why bother writing a review at this late stage (literally years after initial release)? Well, because I finally got around to playing it, and loved it. I know that the demands of my life are not unique, so if I just got around to playing Portal, I am sure there are others out there considering giving it a try for the first time as well. The graphics are simple and clean enough that they barely show age, and the gameplay is still pretty unique and enjoyable. If you don't know enough about Portal yet to buy it, read on...
Here's the quick and dirty overview of the game:
You are a young woman with cybernetic attachments going through, for whatever reason, a training/obstacle course at a testing facility. The facility is run by a terrifyingly comforting sounding computer ("I can't do that, Dave") that watches you at every step.
Every stage of the game involves creative use of the portal-creating device you have been given to... well... get out of the level. The gameplay mechanics are simple. Let's say that you come up against a really deep pit with toxic sludge at the bottom. You aren't Lara Croft and you don't have Boba Fett jetpacks, so how do you get across? In Portal, the solution might be to shoot a portal into the wall at the far side of the pit, and shoot one into the wall on your side of the pit. These portals are connected - creating a wormhole that allows you to step directly out on the other side of the pit.
 In the example depicted here, if you walk into the blue portal you will step right back into the same room (out of the orange portal). Hm, now what if you placed that orange portal above a moving platform you wanted to drop down on...?
And that's it. That's the game. You can jump a small, pathetically human amount. You can crouch. And you can walk forward, backward, left, and right. But you have no guns, and no grappling hooks. It's a puzzle game. Sound boring? Well... go away. It's grand fun.
This game gets YOU hooked with the creative ways in which you need to use the portals to get around (see how I followed up on the "grappling hook" thing?). And it keeps you playing by appealing to a) your curiosity about what comes next, and b) feeling smart when you figured out an elegant way through a level.
The game starts you off easy, as in the pit example described above. But as the levels progress, more and more obstacles arise while the number of floors and walls that portals are able to stick to become fewer and farther between. And as dangerous moving features of the environment and hostile robots begin to appear, time constraints on your decision-making process tighten as well. Don't want to get crushed by the pistons closing in? Better think fast about where to shoot some portals and wriggle your way out of this one!
Combat does enter the game (via the aforementioned hostile robots), but the focus remains consistently on "the thrill of the puzzle". The game never enters Rambo territory (again, you never get a gun). Yes, the robots can be killed, but you do it WITH YOUR MIND (ok - with clever use of portals).
Given the age of the game, you've probably heard most of what can be said.
It is not without its flaws. For example, it's pretty short (although not in a way that you feel ripped off, especially since you can buy it for a song these days on Steam).
There are also only a couple of ways to use the portals effectively against enemies. Because of this, the "combat" form of puzzle solving doesn't really evolve as the game progresses to the extent that the level maneuvering does. But even though "combat" is easy once you figure out the couple of tricks needed clear the room, it is still pleasurable - always a "HA, I'm smarter than you, pathetic drones!" experience.
And that is what really captures the joy of the game for me - its simplicity.
You don't need to remember 10 hot-keys while keeping track of your health bar, magic level, ammo stock, squad members, etc etc etc (my brain gets tired just thinking about the effort!); this game only involves a couple of buttons, and for better or worse there are only a few ways to use the portals to navigate the levels and thwart the hostiles.
So when you win the game (and you will), it's not because you solved a puzzle of Riven-level proportions, having sat there with a pen and paper for hours while your now-ex-girlfriend walked unnoticed out the door shouting about what a complete nerd you are.
And it's not because you tore your way through hordes of enemies with your rocket launcher. Portal has an almost laid back creative bent. At times the platforming is reminiscent of the spatial imagery evoked by descriptions of the training space in Ender's Game. You need to keep your head on a swivel when entering a room and really THINK about the space - be it to devise a way to "slingshot" yourself tremendous distances, leapfrog through portals while airborn over pit of fire, or turn enemy attacks back against the nefarious automatons.
So... if you get horribly turned around just looking up at the sky for a moment in Skyrim, then this game is probably not for you. It takes the kind of 3D navigation skills you honed in low-grav space levels of Unreal Tournament back in 1999 and deploys them effectively in a puzzle-oriented setting, and pads the visuospatial puzzle fun with subtle-but-delightfully-quirky humor. And at the end of the day, if you're a good little gamer, you just might get some tea and cake (no death).
Summary:
Short, only so many ways to use your portals to get things done.
But it is light-hearted, at times exciting, and always rewarding.
A must buy, especially given the relatively minimal time commitment of the game and low price point.
Such is the case with the Portal franchise (Valve). The original Portal marked a fresh take on 1st-person puzzle solving and "platforming" - placing the player in what most screenshots imply is a FPS, but in reality is an immersive vehicle for creative spatial puzzle solving.
Why bother writing a review at this late stage (literally years after initial release)? Well, because I finally got around to playing it, and loved it. I know that the demands of my life are not unique, so if I just got around to playing Portal, I am sure there are others out there considering giving it a try for the first time as well. The graphics are simple and clean enough that they barely show age, and the gameplay is still pretty unique and enjoyable. If you don't know enough about Portal yet to buy it, read on...
Here's the quick and dirty overview of the game:
You are a young woman with cybernetic attachments going through, for whatever reason, a training/obstacle course at a testing facility. The facility is run by a terrifyingly comforting sounding computer ("I can't do that, Dave") that watches you at every step.
Every stage of the game involves creative use of the portal-creating device you have been given to... well... get out of the level. The gameplay mechanics are simple. Let's say that you come up against a really deep pit with toxic sludge at the bottom. You aren't Lara Croft and you don't have Boba Fett jetpacks, so how do you get across? In Portal, the solution might be to shoot a portal into the wall at the far side of the pit, and shoot one into the wall on your side of the pit. These portals are connected - creating a wormhole that allows you to step directly out on the other side of the pit.

And that's it. That's the game. You can jump a small, pathetically human amount. You can crouch. And you can walk forward, backward, left, and right. But you have no guns, and no grappling hooks. It's a puzzle game. Sound boring? Well... go away. It's grand fun.
This game gets YOU hooked with the creative ways in which you need to use the portals to get around (see how I followed up on the "grappling hook" thing?). And it keeps you playing by appealing to a) your curiosity about what comes next, and b) feeling smart when you figured out an elegant way through a level.
The game starts you off easy, as in the pit example described above. But as the levels progress, more and more obstacles arise while the number of floors and walls that portals are able to stick to become fewer and farther between. And as dangerous moving features of the environment and hostile robots begin to appear, time constraints on your decision-making process tighten as well. Don't want to get crushed by the pistons closing in? Better think fast about where to shoot some portals and wriggle your way out of this one!
Combat does enter the game (via the aforementioned hostile robots), but the focus remains consistently on "the thrill of the puzzle". The game never enters Rambo territory (again, you never get a gun). Yes, the robots can be killed, but you do it WITH YOUR MIND (ok - with clever use of portals).
Given the age of the game, you've probably heard most of what can be said.
It is not without its flaws. For example, it's pretty short (although not in a way that you feel ripped off, especially since you can buy it for a song these days on Steam).
There are also only a couple of ways to use the portals effectively against enemies. Because of this, the "combat" form of puzzle solving doesn't really evolve as the game progresses to the extent that the level maneuvering does. But even though "combat" is easy once you figure out the couple of tricks needed clear the room, it is still pleasurable - always a "HA, I'm smarter than you, pathetic drones!" experience.
And that is what really captures the joy of the game for me - its simplicity.
You don't need to remember 10 hot-keys while keeping track of your health bar, magic level, ammo stock, squad members, etc etc etc (my brain gets tired just thinking about the effort!); this game only involves a couple of buttons, and for better or worse there are only a few ways to use the portals to navigate the levels and thwart the hostiles.
So when you win the game (and you will), it's not because you solved a puzzle of Riven-level proportions, having sat there with a pen and paper for hours while your now-ex-girlfriend walked unnoticed out the door shouting about what a complete nerd you are.
And it's not because you tore your way through hordes of enemies with your rocket launcher. Portal has an almost laid back creative bent. At times the platforming is reminiscent of the spatial imagery evoked by descriptions of the training space in Ender's Game. You need to keep your head on a swivel when entering a room and really THINK about the space - be it to devise a way to "slingshot" yourself tremendous distances, leapfrog through portals while airborn over pit of fire, or turn enemy attacks back against the nefarious automatons.
So... if you get horribly turned around just looking up at the sky for a moment in Skyrim, then this game is probably not for you. It takes the kind of 3D navigation skills you honed in low-grav space levels of Unreal Tournament back in 1999 and deploys them effectively in a puzzle-oriented setting, and pads the visuospatial puzzle fun with subtle-but-delightfully-quirky humor. And at the end of the day, if you're a good little gamer, you just might get some tea and cake (no death).
Summary:
Short, only so many ways to use your portals to get things done.
But it is light-hearted, at times exciting, and always rewarding.
A must buy, especially given the relatively minimal time commitment of the game and low price point.
Tuesday, October 19, 2010
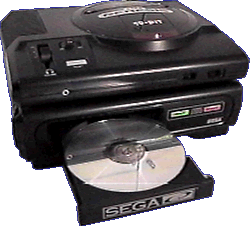
The Sega CD mk1
I recently acquired a mk1 Genesis and Sega CD set with a couple of games for very cheap (along with an original NES, although I'm not sure I will keep that).
 A couple of exciting things for me: the Sega CD is the more unusual original release. I believe it is also known to be more finicky than the second version, but from a collector standpoint I am happy and it seems to work well (no more jiggling of connections than a well-loved cartridge would need). I also got a pristine copy of Sonic CD in the bundle - this game is awesome: enhanced audio (not that I ever found mega drive cartridge releases of sonic to have anything less than excellent sound for what they were), some neat visual enhancements, different time "dimensions" for each level, and the ability to save (taking advantage of save-game space on the Sega CD)!
A neat arcade side-scrolling shooter Sol-Feace also came with it, which seems to have promise.
Right now I'm enjoying the novelty of listening to a Led Zeppelin cd through a 20 year old cartridge-based video game system from my childhood:

I have also discovered that the Genesis and Sega CD, when hooked up to my HDTV via the RF cable, function as a very effective amplified antenna - when powered off, nothing, but when powered on, my over-the-air reception of digital tv is easily as good as it is when I have my amplified antenna hooked up (to clarify, though, your TV must still have a built in digital tuner for this to work ;-) )
 A couple of exciting things for me: the Sega CD is the more unusual original release. I believe it is also known to be more finicky than the second version, but from a collector standpoint I am happy and it seems to work well (no more jiggling of connections than a well-loved cartridge would need). I also got a pristine copy of Sonic CD in the bundle - this game is awesome: enhanced audio (not that I ever found mega drive cartridge releases of sonic to have anything less than excellent sound for what they were), some neat visual enhancements, different time "dimensions" for each level, and the ability to save (taking advantage of save-game space on the Sega CD)!
A neat arcade side-scrolling shooter Sol-Feace also came with it, which seems to have promise.
Right now I'm enjoying the novelty of listening to a Led Zeppelin cd through a 20 year old cartridge-based video game system from my childhood:
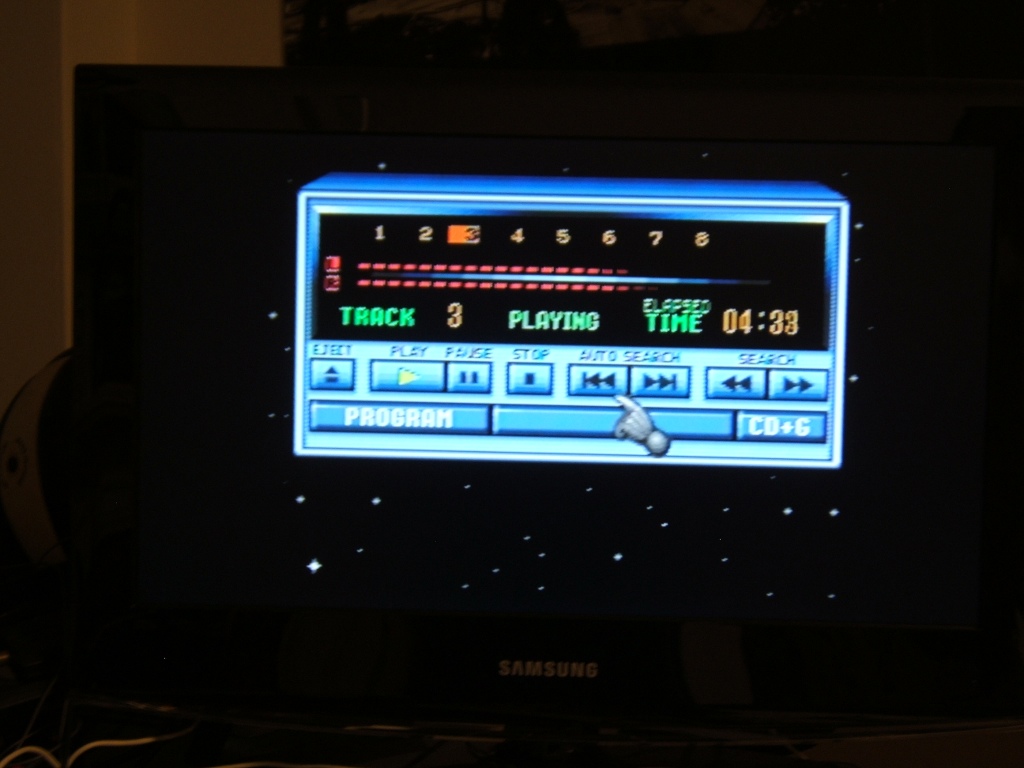
I have also discovered that the Genesis and Sega CD, when hooked up to my HDTV via the RF cable, function as a very effective amplified antenna - when powered off, nothing, but when powered on, my over-the-air reception of digital tv is easily as good as it is when I have my amplified antenna hooked up (to clarify, though, your TV must still have a built in digital tuner for this to work ;-) )
Monday, May 11, 2009
Game Gear LED Backlight Mod

The following is a guide to a recently completed LED backlight mod I made on my blue Game Gear. Why do this? The standard Game Gear gets only 2-3 hours of battery life on 6 AAs. This is not good, and is largely due to the flourescent tube which illuminates the screen. With the LEDs you can get around 8 hours of battery life! Be aware of two things: the LEDs are a focal light source, and therefore will most likely have slight hot-spots nearest to the bulbs (see image). Secondly, I have found the screen is generally dimmer with two bulbs. The bulbs themselves are plenty bright and capable of washing the screen out if you turn the brightness up, but because the light is not completely uniform the screen is dimmer farther from the bulbs. Feel free to play around with more bulbs or different configurations - just adjust the resistor you use accordingly.
Please note that the mainboard depicted is not the original in the system - I replaced it with one from one of the Majesco re-releases of the Game Gear (better screen and audio). The Majesco boards have one primary ASIC controller chips, as opposed to the two on the original systems. If you have one of the original Game Gears, don't sweat it. This mod applies to either model.
I would also like to note that I did not develop this mod myself. A poster with the username of Tibia at the Benheck Forum was the brains behind this. She has also posted a guide, with much crisper images and her own instructions. The resistor I used in my mod is more conservative to ensure the LEDs don't burn out. The LEDs I used are also larger. Check her work out as well, and between the the two guides you should have more than enough info.
As Tibia also notes, you could potentially damage your Game Gear doing this. If you do it right, you shouldn't, but do this at your own risk!
You will need the following supplies for this modification (I've posted links to buy the less common parts):
- Soldering Iron
- Solder
- Screw drivers (philips, game bit)
- Pliers
- Hot Glue Gun or Epoxy
- Electrical Tape
- Wire cutters
- Wire
- Two 3.3V 5mm white LEDs
- 39 ohm 1/4 watt resistor
- Smaller sized heat-shrink

Here's the inside of the famous Game Gear. See those blurry red Xs? Those are the areas of interest. There are 10. The 4 components in the top left are dedicated to powering the CFL tube which currently lights the system. We will be removing them. We will also be removing the tube (obviously) and its resistors, marked by the 6 Xs around the reflector in the center of the system. Closeups are below.
Step 2) Remove all the screws mounting the mainboard to the case. The small screws passing through the white plastic right around the screen also hold the LCD to the mainboard. You should remove them to get the screen out of the way, but be careful when you do so it doesn't flop away and hit something or pull on the ribbon cable too hard.
When the screen is removed as far from the blast zone as the ribbon cable will allow, remove the reflector plate from the around the CFL tube. Now you can have some fun!
Step 3) Begin to desolder all the components marked above with the red Xs. Use the pliers to gently pull on the component while you melt the solder with the iron from the other side of the board. Some components will come off easily, like the CFL tube and the resistors. The large square transformer, however, might be difficult. Try to get the contacts on one side loose then work on the other. Do not throw out the rubber CFL tube endcaps. You will be mounting your LEDs in them.

Here's a shot of the side where all those components used to be. The Xs denote these locations. Take note of the light green circles I marked on the board.
- The two green marks within the white circle need to be connected to each other. Solder a bit of wire between the two contacts to resolve this.
- The green mark by itself on the left of the white square on which the transformer sat is a ground point. This is where your LEDs will be grounded.
- The green mark in the center of the five contacts at the bottom of the white square is the current source. It is 5 Volts, for those interested. The 39 ohm resistor will be connected to this point.

Here's a shot of the other side of the board. Not much needed to happen here, just the removal of the CFL tube and its resistor. Those spots are again marked with the Xs.
Step 4) We now need to prepare the LEDs. I think it helps to sand the LEDs so that they have a milky-white appearance. This might help diffuse the light from the bulbs so they have less of a brightspot. Compare the one on the left to the sanded one on the right:

Now clip the wires of the LEDs relatively short, and solder your wires to them. Make sure the wires have about 5" length to them to allow for mistakes. Take note of which wire is attached to the positive and negative sides of each LED to avoid mistakes later. Use heatshrink to insulate the bare wire and solder. Like so:

Now feed the wires through the rubber CFL end-caps. Situate the LEDs so that the bulbs are submerged into the rubber caps (sinking them so the tip is flush with the opening of the end-cap has a better effect than the half-way position I've depicted here). Get them as nice and centered as you can, and fix them in place with epoxy to ensure your backlighting doesn't change with the movement of the car. It should look something like this:

Once the LEDs are fixed firmly in place, glue the rubber caps to the sides of the reflector plate. They won't stay in place otherwise. It should look like this:

Finally, connect the LEDs to each other in parallel. This means the positive wires from both LEDs are soldered together, and the negative wires from both LEDs are soldered together. From the unions of the positive and negative wires run a single wire to connect to the ground and power source on the board. The voltage source is 5v; there are numerous resistor calculators online for you to consider when trying to pair the LEDs you bought with appropriate resistance (in my case 25mah 3.3v wired in parallel: Try this calculator). I recommend trimming the LED wires on the side near the ground and power short to avoid excess cable in the case. Insulate the junctions where the positives merge into one and the negatives merge into one using heat-shrink so it looks like so:

Step 5) Now it is time to finish the job. Solder the resistor to the center of the row of five contacts identified above. Clip its ends short to keep a low profile on the circuit board. Position the reflector with its LEDs back to the mainboard, reposition the LCD screen, and use the screws to fix the two together on the board again. Solder the LED negative to the other end of the resistor. Now your LEDs have power. Solder the positive LED wire to the ground point on the board. Now the circuit is complete. It should look like this (only less blurry), indicated by the green lines:

Finally, we need to make sure the wires don't get in the way of anything. Use electrical tape to affix them to the side of the reflector, like so:

Your mod is complete. Put the Game Gear back together, pop in some batteries and enjoy the improved energy efficiency!

**EDIT** I have since pursued modifications to improve the dispersion of the backlighting (reduce the hot-spots and allow for brightness to be raised without washing the image out as much). So far, I've had LITTLE SUCCESS.
But stay tuned, or offer up any suggestions! Also, if anyone has images of an improvement on this approach, feel free to share and I'll put your work up. There seems to be a lot of interest in this modification.
**EDIT #2**
I have since tried an opaque white straw as a diffuser (POSTED HERE). But the results were unsatisfactory.
Thursday, April 16, 2009
Systems to date
This site was created as a way for me to discuss the games and systems I love (and don't love). I've also done a little work modifying and repairing some of my older systems, and I'll share some of that work over time.
I'll start off by summarizing my currently owned video game systems, and past ones while I'm at it. I figure I'll mostly be writing about games I own and play, so heres some context!
Currently owned (in chronological order of acquisition):
Previously owned:
I'll start off by summarizing my currently owned video game systems, and past ones while I'm at it. I figure I'll mostly be writing about games I own and play, so heres some context!
Currently owned (in chronological order of acquisition):
- PC - *Currently with Win 7 64-bit and Ubuntu, on AMD Phenom II X4 965BE, 8GB Ram, MSI R7 260X OC
- Sony Playstation 2 (original "brick" edition)
- Sega Dreamcast (Black Sega Sports Limited Edition)
- 2 Sega Game Gears (One traditional release, one Blue Limited Edition with some improvements)
- Nintendo Wii
- Sega Nomad
- Sega Genesis MKI
- PS3 160 GB slim
- PS4
Previously owned:
- Microsoft XBox
- PS3 60 GB (RIP after years of good service)
- Sega Genesis 2
- Sega CD MKI
- Nintendo NES
Subscribe to:
Posts (Atom)